Showing posts with label high tea. Show all posts

Friday, 8 August 2014

Victoria Sponge Cake With Homemade Strawberry Jam


Hi! I'm now working from Wordpress. I've spent a great deal of time editing and reorganising this post on Wordpress and it is so much friendlier to read & follow my recipe from there. Click on this link to take you directly to the recipe:
Link to my newest and old recipes, click:

As part of my English Afternoon Tea spread, I always bake a 6" size Classic Victoria Sponge Cake.

This is a good cake especially with home made strawberry jam. It is at its best served on its own with just a pot of tea.

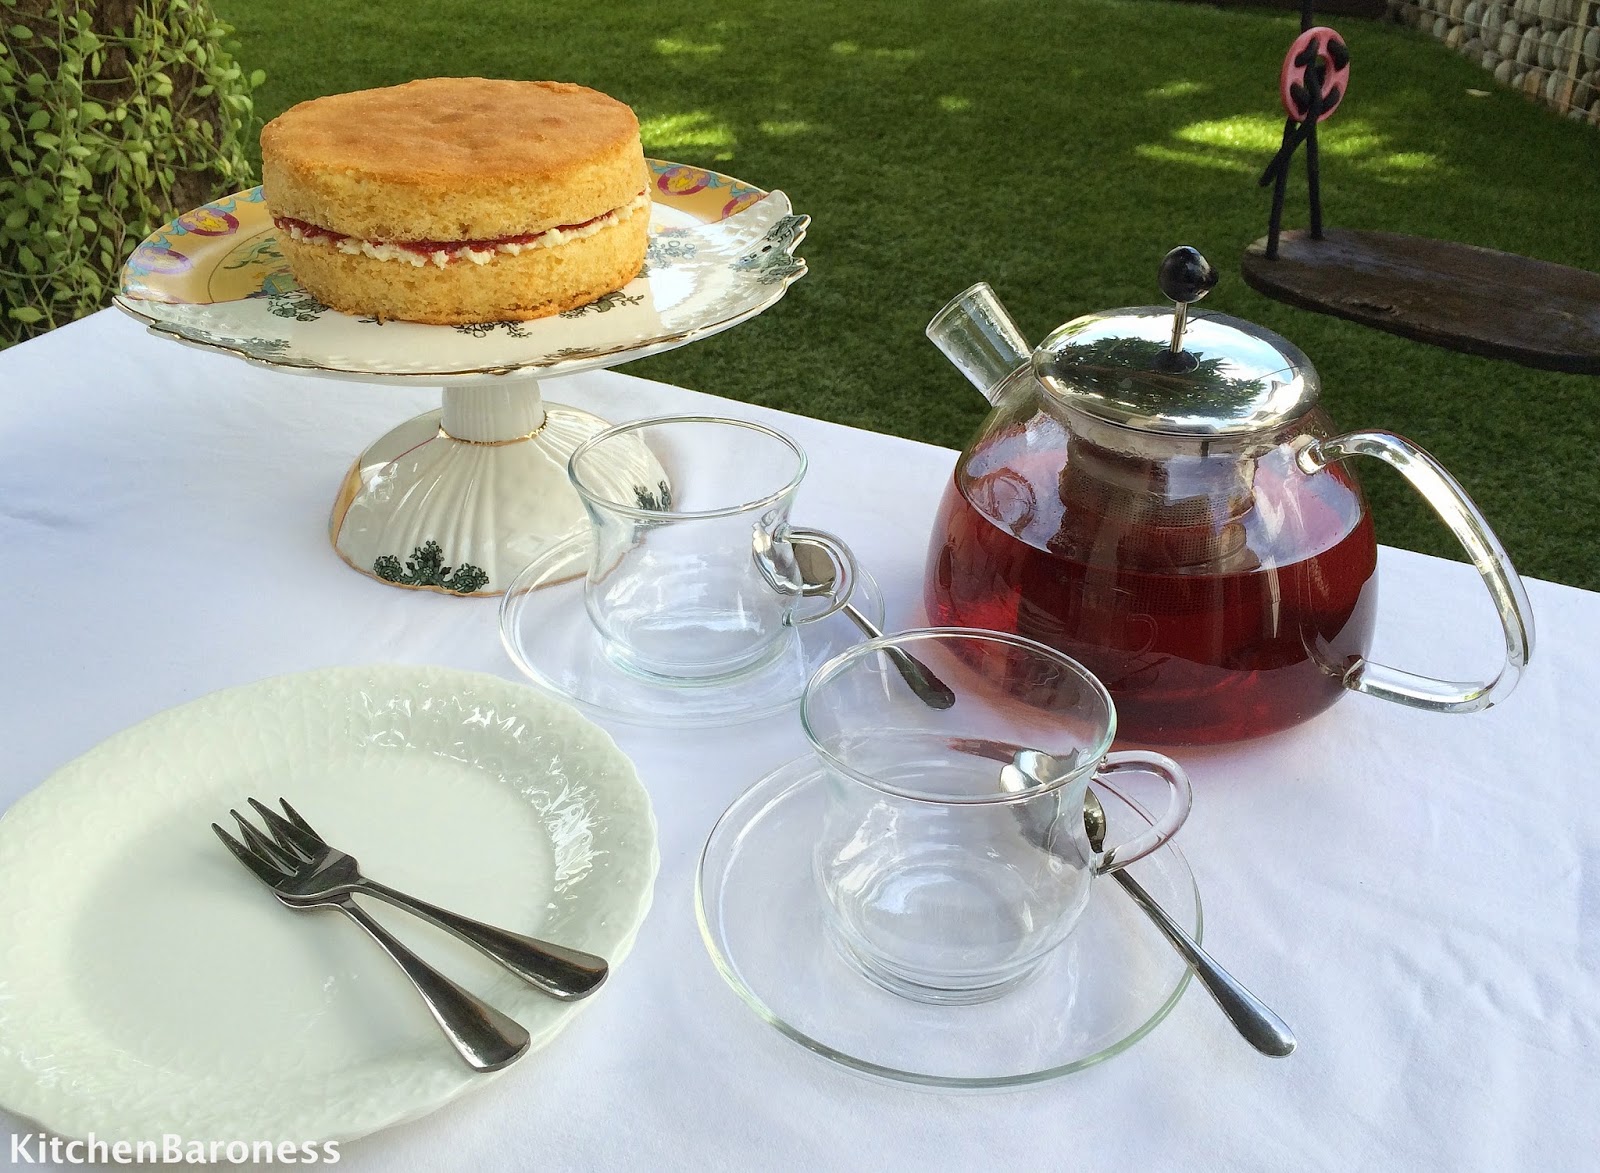
The cake was pretty much gone in a flash.
No, the dog did not have cake. The dog does not eat cake.
I am sure the dog wished it could eat cake.
VICTORIA SPONGE CAKE                                                   

Prep:
20 minutes
Cook:
30 to 35 minutes in oven
Inactive:
-
Level:
Intermediate
Makes:
8 slices
Oven Temperature:
340 F (170C)
Can recipe be doubled?
No
Make ahead?
Yes, wrapped in plastic wrap and refrigerated up to 2 days.


Ingredients

3 and 1/2 oz (100g) unsalted butter
Softened

3 and 1/2 oz (100g) caster sugar

3 and 1/2 oz (100g) weight of eggs without shells
Lightly beaten, (about 2 medium size eggs)

3/4 cup (3 and 1/2 oz) (100g) self raising flour OR to make self-raising flour:

If using measuring cup:

Fill the bottom of measuring cup with 1 and 1/8 teaspoons baking powder, 1/4 and 1/8 teaspoon salt, top up with enough all-purpose/plain flour to reach 3/4 cup.

If using kitchen scale:

Add 1 and 1/8 teaspoons baking powder, 1/4 and 1/8 teaspoon salt, then top up with flour to reach 3 and 1/2 oz (100g).

1/4 teaspoon salt
Omit if you are using salted butter

The Buttercream Filling

1 oz (30g) unsalted salted butter
Softened

2 and 1/2 oz (75g) icing sugar

You must sift the icing sugar or your buttercream might turn out lumpy.

The Strawberry Filling

Strawberry jam for spreading or use homemade strawberry jam (look under 'Tips' section at the bottom of this post for recipe)

Directions

Before starting, all your ingredients, flour, butter, sugar, eggs and salt (if using) must be at room temperature. 

Turn on the oven to 340F (170C), oven racked positioned lower middle. Prepare two 6" (15cm) round cake tins by lining the bottoms with a circle each of parchment paper and then grease the insides of cake tins with butter. Set aside.

With machine at medium speed, cream butter and sugar until light and creamy. Stop machine, scrape bottom and sides of mixer bowl to ensure even mixing. Mix another 1 minute. At this point, your batter should leave a ribbon trail when you lift your beaters/whisk up. All this should take you about 2 to 3 minutes.
With machine at low-medium speed, add half of eggs and beat 1 minute.  Lift beaters/whisk and use a spatula to scrape bottom of bowl to quickly and evenly incorporate batter.   Turn on machine back to low-medium speed, add remaining eggs and beat 1 minute. Stop machine, scrape and incorporate again.
Remove mixer bowl. If you are using unsalted butter, you need to add salt to the flour now. With a long metal spoon or spatula gently sift and fold in flour in 3 intervals. This usually takes me 1 minute. Flour has to be almost and not completely incorporated into batter before you add in the next batch of flour.

Incorporating flour the first time. Flour clearly visible on batter.
Incorporating flour the second time. A little less flour visible on batter.
Incorporating flour the third time. Almost no flour is visible on batter but there will be flour on the sides of the bowl.
Incorporate the flour on the sides of the bowl with a spatula. Just a few quick scrapes will do.
Distribute batter into the 2 cake tins. Level the batter out. They will look pathetically squat. It is fine. These are not chiffon cakes. Bake at 340F (170C) for 30 to 35 minutes.

To test if cake is done, insert a skewer. If it comes out clean, it is done.  Alternatively, very lightly press the centre of the cake, if it springs back without feeling like you just touched something semi liquid, it is done. The circumference of the cake would have separated ever so slightly from the sides of the cake tin.

Remove to a cooling rack and let it cool completely before removing from cake tins. Do not peel off parchment papers.

Making Buttercream

While waiting, place soften butter and sifted icing sugar into mixer bowl. Attached whisk attachment and whisk until you get a spreadable icing consistency. Transfer to a bowl and cover.

Assembling

Have the following items ready:

  • Plate or cake stand where your cake will be served
  • 2 palette or butter knives for spreading
  • Strawberry jam, room temperature
  • Buttercream icing
  • 7" square of parchment paper
Choose the cake that will be used for the top piece. Set that aside. 

Remove the parchment paper off the other cake, invert the cake (top of cake will face the cake plate) and set it on the cake plate.


Use the knife to spread inward out, an even layer of buttercream icing on this cake. You do not have to use up all the buttercream. I had about 1 to 2 Tablespoons left. 


Loosen up the strawberry jam with the knife. Gently dollop jam on top of icing and spread it inward out in an even layer. Set aside


Invert the other cake on to the 7" square of parchment paper.  Peel off parchment paper stuck to bottom of the cake. Spread a thin layer of jam on the side where you peeled off the parchment paper. With the help of the 7" square of parchment paper, lift this cake and sandwich it over the other cake.


You have yourself a Classic Victoria Sponge Cake.

Tips

This cake tastes best with home made strawberry jam which is easy to make. This is the way I make mine.
  • Recipe for about 1 cup of jam:
17 and 1/2 oz (500g) strawberries; 1/2 to 1 cup of sugar or jam sugar (it has added 'pectin' in it that helps set the jam and produces a slightly thicker consistency similar to store bought jam). 

Hull strawberries. Place strawberries and then sugar in a nonstick pot over medium high heat. After about 2 to 5 minutes, it will probably be a good time to stir. Boil away another 5 minutes. By this time the strawberries will look swollen. Take out your potato masher or use the back of a spoon to break up strawberries.

Let it boil another 10 to 15 minutes. Some foam would have formed. I just stir it back in when the jam is done.  It will look slightly thick but not quite jammy. I like my jam a loose consistency so when it looks like thick honey, I turn off the burner and take it off the heat. Cool completely and store in sterilised glass jars. It keeps at least 3 weeks but only manages to last 2 weeks and only a day if I serve it with my Sweet Milk Scones.

Jam makers will tell you that for jam to reach the 'set' stage, the thermometer needs to register 220F (105C). There are other 'set tests' you can carry out. Google it. Lots of detailed explanations which I will not get into. With the very little sugar to fruit ratio that I use, it might not reach the recommended temperatures. You can take out your thermometers and use it if you like but I know how I like my jam. Do not try and cut down the sugar to anything less than 1/2 cup as it does play a part in getting the jam to the right consistency.

Sweet and slightly tart. It tastes like fresh strawberry jam which it is. So much better than bottled jam. How much do I like this jam? I have almost given up on strawberry filled jelly doughnuts because there is never enough jelly in it for me. Now, I buy plain doughnuts and scoop a quarter cup of my strawberry jam next to a doughnut. It keeps me happy. Oh, I also scoop it over vanilla ice cream. So satisfying.

Update: I have since put up a separate post for this recipe, Homemade Strawberry Jam. It goes into a bit more detail, has more photographs to guide you and I have included other recipes where you can use the Homemade Strawberry Jam. Click here, Strawberry Jam Simplified.
WHAT'S COMING UP NEXT?                              
I am done with my series on English Afternoon Tea! 

Have friends and family over and serve them the entire spread of English Afternoon Tea pictured here! Better still, have somewhat make it for you!


English Afternoon Tea. 


Top plate: Classic Victoria Sponge Cake, Checkerboard Cookies,
Sweet Milk Scones.

Bottom plate first layer: Egg and CressRoast Beef with BeetrootCrisp Cucumbers.
Bottom plate second layer: Roast Beef with BeetrootSalmon
Recently posted:

Classic Victoria Sponge Cake


In my next post, I am moving on to a savoury snack that I serve pre dinner when I have guests over. I tend to make big batches of the batter and freeze them in smaller freezer bags. I remove a bag, thaw it, snip of a corner of the plastic freezer bag and pipe it over hot oil. 


These little gluten free bites keeps everyone happy while I get dinner prepared. Sometimes I make a coconut or mint chutney to go with it or horror of horrors, I open a bottle of Prego Marinara and use that as a dip.

Look out for my next post!


Thursday, 24 July 2014

Roast Beef With Beetroot Tea Sandwiches


Hi! I'm now working from Wordpress. I've spent a great deal of time editing and reorganising this post on Wordpress and it is so much friendlier to read & follow my recipe from there. Click on this link to take you directly to the recipe:
Link to my newest and old recipes, click:

Buttery beef tenderloin, a sliver of sweet beetroot, dollops of a light sour cream and mayonnaise mixture in between slices of white bread. That's a rather nice Afternoon Tea Sandwich.


The idea for this sandwich came from an afternoon spent in The English Tea Room at London's Brown's Hotel. It was a roast beef and beetroot sandwich. I did not think the pairing worked. It was visually pretty but it was just another beef sandwich. 


My ideal roast beef tea sandwich. Beefy tasting,
 tender and moist.
That sandwich needed a touch of moisture, something to lighten it up and the beef needed more flavour. I politely declined a second helping. I was saving tummy space for more Cornish Clotted Cream with Sweet Milk Scones anyway.  Now, that's my all time favourite English Afternoon Tea item. Read more about it in my earlier post. I digress.


English Afternoon Tea. I could have this all over again!

Top plate: Classic Victoria Sponge Cake, Checkerboard Cookies,
Sweet Milk Scones.
Bottom plate first layer: Egg and Cress, Roast Beef with

Beetroot, Crisp Cucumbers.
Bottom plate second layer: Roast Beef with Beetroot, Smoked Salmon

with Dill ButterHam with Honey Butter

Back home, images of that sandwich would not leave my head. I had to make the sandwich work I thought. It was just too interesting a food combination to let it pass. So after roasting four rolls of beef tenderloin, yes four, I have my perfect roast to make those sandwiches. 

We need to balance the flavours of the roast beef and the beetroot. Beetroot is hearty and earthy.  To bring out its underlying sweet flavour, you need to roast the whole beetroot in its skin and use only one slice per sandwich. Anymore and it will overpower the beef. 


The beef had to be melt in the mouth tender so you can bite through the sandwich delicately with each bite. This is English Afternoon Tea after all, one needs to or at least try to be elegant. You do not want to be caught trying to chew off sinewy beef in mid-sentence. Then again, one should not be talking while eating. 


Slices of buttery madness!


So the beef had to be a tenderloin which when cooked properly and that means only cooking it to medium rare, promises slice after slice of buttery tender madness. The beef must be seasoned well not once but twice to ensure flavour. Salting and peppering alone is quite inadequate. 

These two individually strong flavoured ingredients needed something moist to bind the flavours together as well as to lighten it up. If you use only mayonnaise, it would be too heavy. Using the right proportion of light sour cream and mayonnaise was the answer. The sandwich does not need anything else. The beef is the star. I kept it simple. 

If you are not into sandwiches, just roast the beef tenderloin and eat it as it is. No sauce required as it is so moist and tasty it really needs no further embellishments.

I hope you try this recipe. It is rather good. 


ROAST BEEF WITH ROASTED BEETROOT TEA SANDWICH     


Prep:
15 minutes for beef and beetroot + 30 minutes to assemble sandwiches

Cook:

1 hour to roast beetroot.

4 minutes to sear beef plus 25 minutes (+/- 5 minutes) to roast: about 5 minutes per 3 and 1/2 oz (100 g) of beef @ 250F (125C).

Inactive:

None 

Level:

Intermediate 

Makes:

12 finger sandwiches 

Oven Temperature:

For the beetroot: 400F (200C)

For the beef: 250F (125C)

Can recipe be doubled?

Yes. Roast 2 similar size rolls of tenderloin and not one big roll. Cooking time would be somewhat the same give or take 5 to 10 minutes.

Make ahead?

Beef and beetroot can be roasted and refrigerated one day ahead. 

I actually prefer to roast both a day ahead. The beef will have rested well and upon slicing, look like something bought from a top end delicatessen but only much better.

Moreover, it means it leaves me time to casually assemble the sandwiches and look like a pretty cool unfrazzled hostess. I wish!

Refrigerated sandwiches do keep well through the next day and stays soggy free.


Ingredients


7 oz (200 g) whole beetroot

Wash well and leave skin on.

1 and 1/4 lb (550 g) beef tenderloin

Try to get a cut of beef that is more or less evenly sized throughout its length (ask for the centre cut), do not get the end cuts as those tend to taper off. If you can, have your butcher tie the roll of beef tenderloin.

2 tsp Dijon mustard

2 tsp oil

1 and 1/2 tsp of Soy Sauce/Tamari/Bragg

Tenderloin beef while very tender is milder in flavour compared to other cuts of beef. Rubbing Soy Sauce/Tamari/Bragg gives it the extra depth of flavour that it needs. Do not skip.

1 tsp salt

1/2 tsp pepper

1 Tablespoon oil

For searing beef if you are not using a nonstick/cast iron pan

1 Tablespoon oil

If you are using a roasting/baking tray

12 slices of white sandwich bread

Butter 

For buttering bread slices

2 Tablespoons mayonnaise 

6 Tablespoons light sour cream


Directions

The beetroot

Two hours before your are ready to roast the beef, heat up the oven to 400F (200C) oven rack adjusted to middle position. Wrap the beetroot in aluminium foil. It should look like a UFO.  Hot air circulates within the package and helps speed up cooking. That is what I am told anyway.

Bake in heated oven for 1 hour. Beetroot is cooked when you can easily insert a skewer through it. Unwrap and when it is cool enough to handle, peel off the skin which can be pretty fun. Slice the beetroot as thinly as you can manage. Cover and set aside.


The beef

Bring your beef to room temperature and turn on the oven to 250F (125C), oven rack adjusted to middle position.

If you have an oven safe skillet/grill/iron cast/frying pan this is the time to use it. If you do not have one, you need a skillet/frying pan that is preferably nonstick as well as a roasting tray or a baking tray that will fit the beef tenderloin. Place your roasting/baking tray in the cold oven to heat up at the same time as your oven heats up.


If you were unable to have the butcher tie up the beef, it is easy to do it yourself if you have butcher's twine. The simplest way is to tie a dead knot at 1"(2.5cm) intervals.

The reason for tying the beef is to get your beef into a somewhat uniform size for even cooking, especially if you were unable to get a centre cut. If you have no butcher's twine, you should be fine without tying the meat. With such a small roll of beef, the beef should be fairly even in size throughout anyway.

Mix the soy sauce, mustard and oil. Set aside.

Just before your are ready to cook, salt and pepper the beef.

Heat up your skillet/grill/iron cast/frying pan until it is very hot. If your are not using a nonstick pan, grease the pan with 1 Tablespoon of oil.

In that very hot pan, sear each side of beef for no longer than 60 seconds. There are 4 sides so that means no longer than a total of 4 minutes. I would usually take only 45 seconds to sear the last side as the beef would have sat a little longer (hence have more cook time) in the hot pan when you transfer it to the work surface to slather on the soy sauce, mustard and oil mixture. Remember, you do not want to sear the meat any further then required. Otherwise, you might not achieve the nice pink centre on the tenderloin.

Remove skillet/grill/cast iron/frying pan from stove and onto work surface.


Use a spoon to slather soy sauce, mustard and oil mixture all over beef, bottom side included. Transfer the oven safe skillet/grill/iron cast/frying pan into the oven. If you are not using an oven safe skillet/grill/iron cast/frying pan, before you transfer the meat onto the preheated roasting/baking tray, grease the tray with 1 Tablespoon of oil.

For a meat this size, you want to roast it for about 25 minutes (+/- 5 minutes) to medium rare. It works out to be about 5 minutes per 3 and 1/2 oz (100 g) @  250F (125C). It will continue to cook when you take it out from the oven and tent it under aluminium foil.

After 20 minutes, use a meat thermometer to check that the meat registers an internal temperature of 135F (55C - 60C) at its thickest part. If you do not have a thermometer, carefully prod the meat at its thickest part with your index finger.  It should feel the same way as when you prod the fleshiest part of your open palm. For me that would be the flesh that sits 3" (8cm) down from my pinkie finger. This is my personal finger test for beef cooked to medium rare. Read the 'Tip' section below to find out how you can accurately get meat cooked to the level of 'doneness' that you like each and every time.

Always transfer the beef onto a plate, when it is done cooking, tent loosely with aluminium foil and leave it alone for at least 20 minutes before slicing.  Do not leave it on the roasting/baking tray or skillet/grill/iron cast/frying pan or it will continue to cook.

You do not want the beef tenderloin cooked any further or worse still, until 'well done'. It is a very lean cut of meat and your meat will be very dry at 'well done' stage and quite tasteless as well. Better to cook it medium rare where you can still salvage the meat with brief cooking if you find it too rare.

When the roast has rested its 20 minutes, I usually leave it for 30 minutes, slice into thin slices. This roll of tenderloin was left overnight in the refrigerator. Try a slice and tell me you were able to stop at one slice. It is so buttery smooth, it will just slide down your throat.

It looks and taste much better than any roast beef bought from a delicatessen.


Assembling

Mix the light sour cream with the mayonnaise. Set aside this cream mixture and have a teaspoon ready.

Lightly butter all the bread. The butter acts like a protective barrier to prevent the bread from becoming soggy after you add the sandwich ingredients.

To assemble sandwich, start with one layer of beef and top with one round slice of beetroot. With the teaspoon, top that off by lightly dolloping 1 to 1 and 1/2 teaspoon of the cream mixture. Do not add too much cream. The sandwich does not need it and you will have soggy sandwiches.

With a serrated bread knife and with a sawing motion, trim off the crusts and slice sandwich into two rectangles. Do the same with the rest of the bread slices.

Invite people over and serve as part of an English Afternoon Tea spread or just brew yourself some tea and enjoy it with just that cuppa.


Tips

  • The best advice I can give you to get meat done the way you like is to purchase a meat thermometer.  Think of it this way. Beef is expensive. Beef tenderloin is one of the more expensive cuts of beef. It would be a pure waste of effort and money to have beef not done to your liking and worse, overcooked and inedible because you lacked a thermometer which is cheap compared to the price you paid for the meat. Get a thermometer.
  • Invest in an oven-proof thermometer. You need only insert the thermometer once into the thickest part of the meat at the beginning of cooking. 'Oven-proof' means you can leave it in the meat throughout the cooking process and check on how the meat is fairing whenever necessary. You can not leave an instant-read thermometer in the oven. As its name suggest, it reads the meat temperature for an instant and then you have to remove it. I do not recommend instant-read thermometers as that repeated skewering into the meat draws out a lot of meat juices and dries up the meat. Go for an oven-proof thermometer.
  • If you have any leftover beef, which I doubt you will have, they are great for salads or to top on ramen but I really just eat them straight off the plate, sometimes with a little Dijon mustard.
  • You will have left over beetroot slices. We roasted such a small beetroot, you will only have enough to make a salad. This is the salad I made. That is my '20-minute Pickled Onions' strewn on top. That recipe can be found under the post, Mango Salad with Salmon and Scallops Ceviche. There are also capers, lemon zest, gorgonzola, salt, pepper, extra virgin olive oil and lemon juice over it. Very good with crusty bread.


WHAT'S COMING UP NEXT?                                                  

It has to be the recipe for Smoked Salmon with Dill Butter Tea Sandwiches!

This is part of a series I am posting on an English Afternoon Tea spread. The selection you see on the 2-tier cake stand at the top of this post would be the recipes I will be posting. Recipes for Sweet Milk Scones and Checkerboard Cookies have recently been posted. Take a look at those. The Checkerboard Cookies can be rather fun to put together.